Before you begin
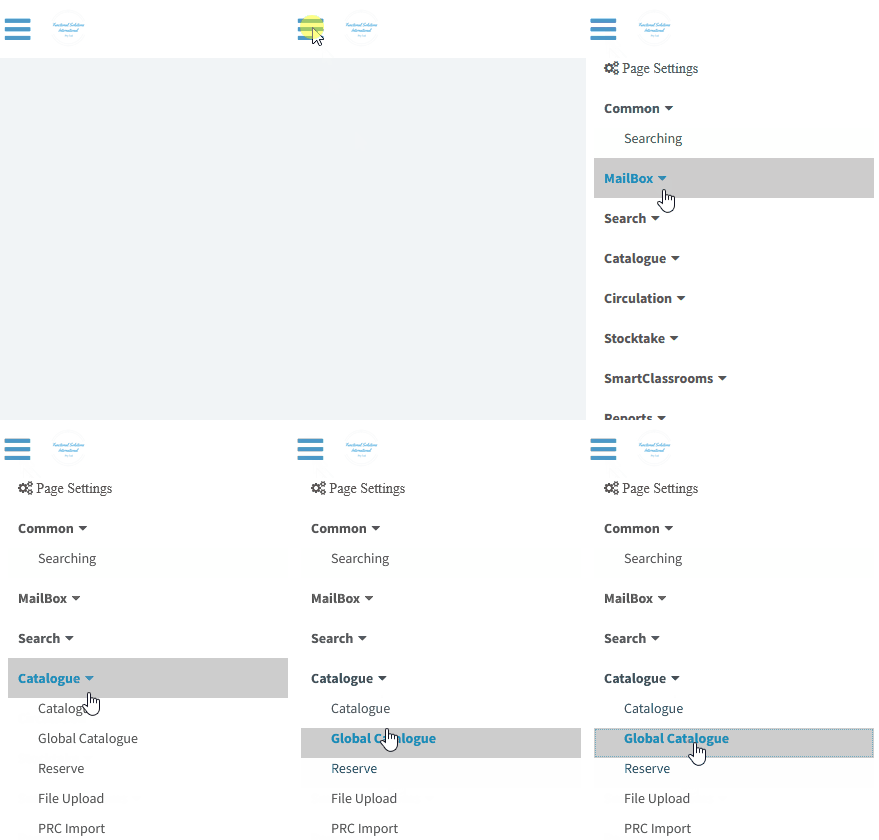
Ensure that your default labels has been configured in Global Catalogue
1. Click  -> Catalogue -> Global Catalogue

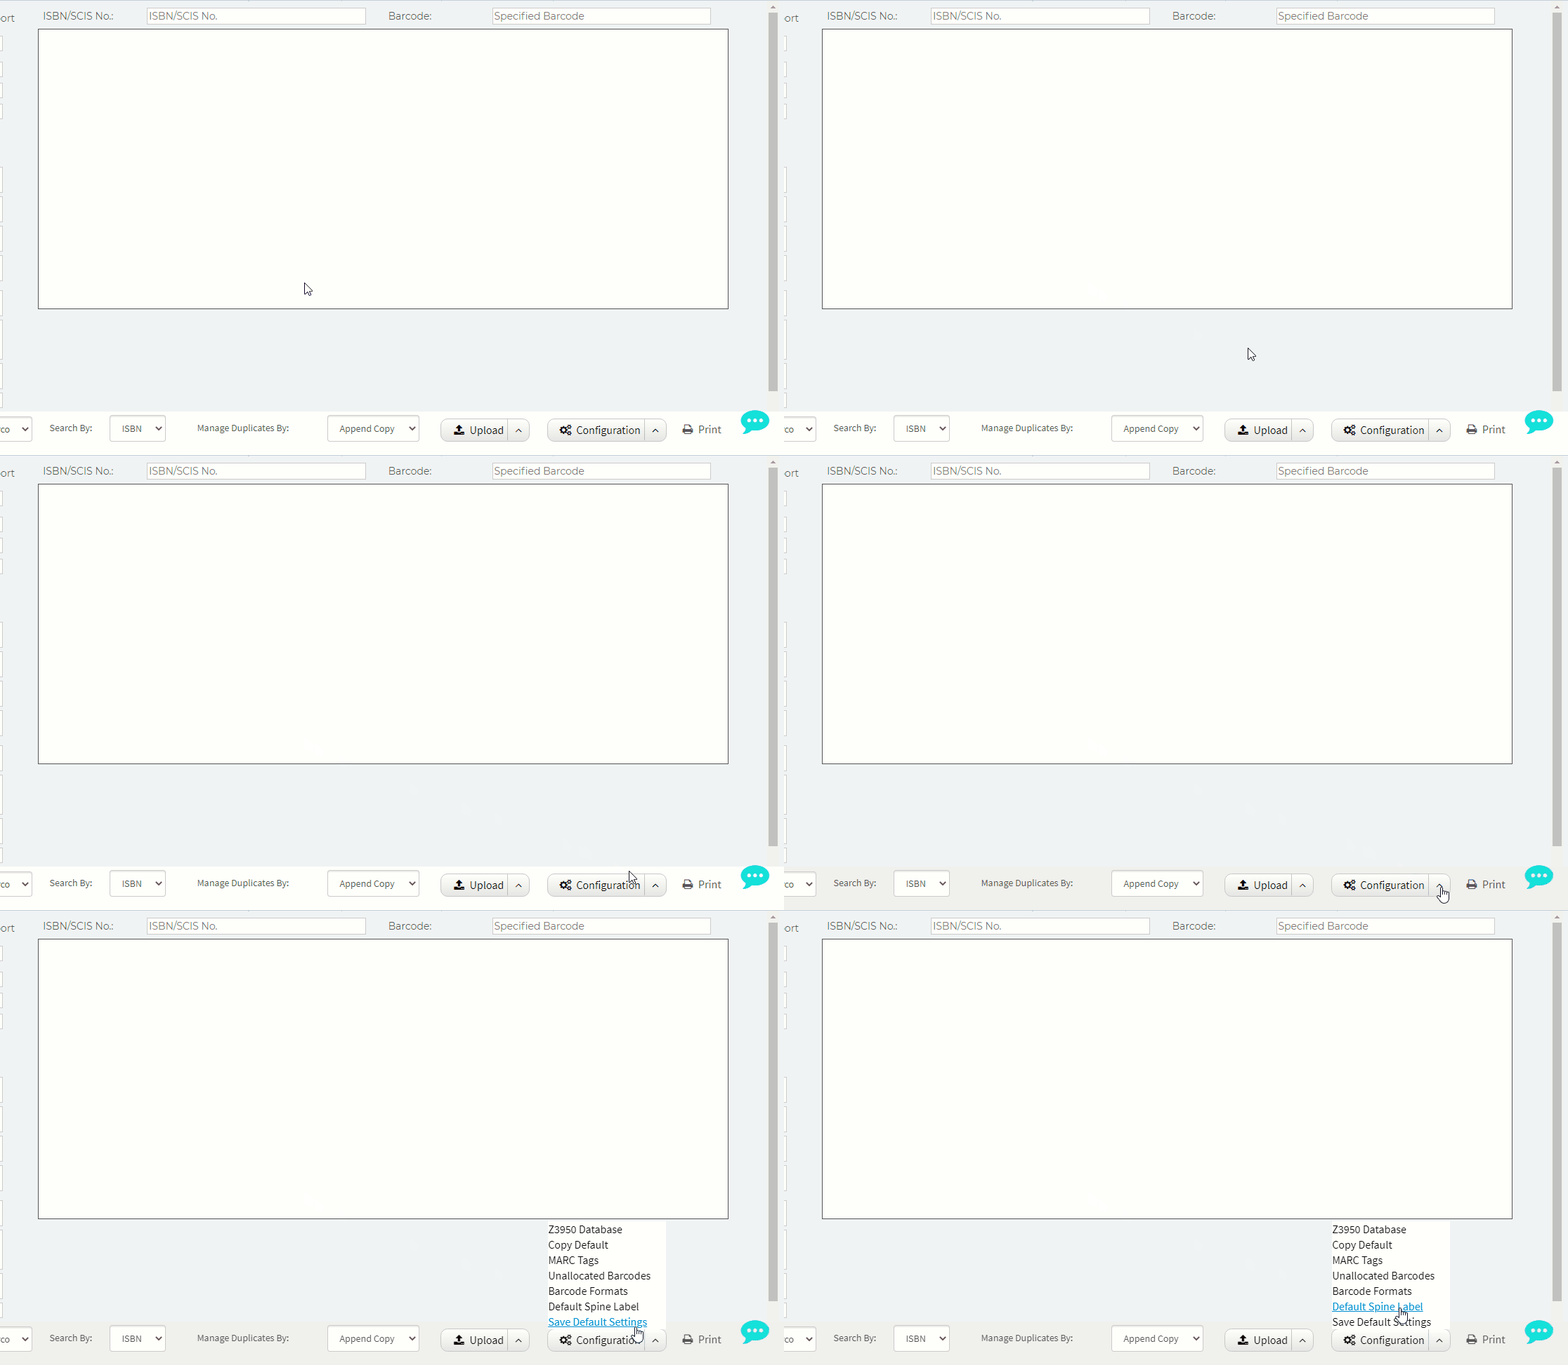
2. Click  next to the configuration button
3. Click Default Spine Label

4. Select Raeco 12603 from the drop down list
5. Click 
Printing spine labels
N.B. Printing spine labels from Global Catalogue requires successfully imported barcodes to be listed on the page.

If you navigate away from this page, your barcodes will be reset and the following instructions will not work.
1. Complete your import cataloguing session
For instructions on importing records using Global Catalogue see: Bulk Import (Global Catalogue).
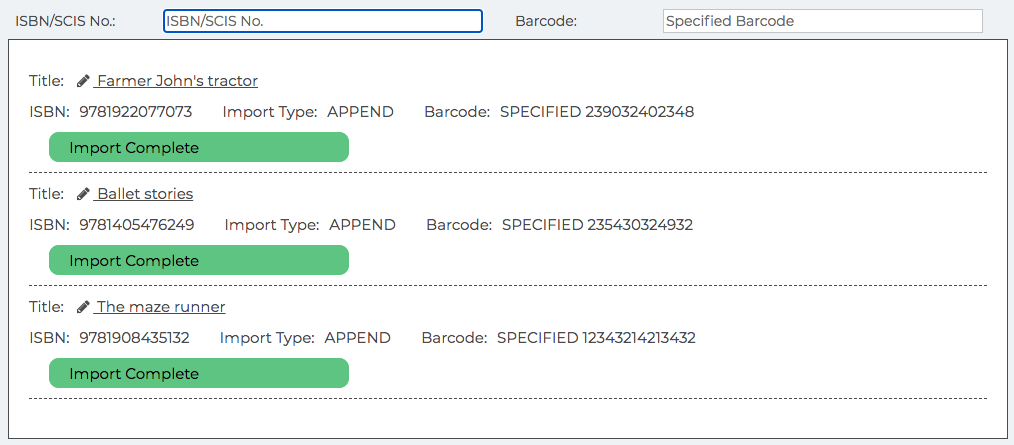
2. Your screen should have barcodes listed in the "Import Progress" window highlighted in green (successfully imported)

3. From the toolbar at the bottom of the window, click 
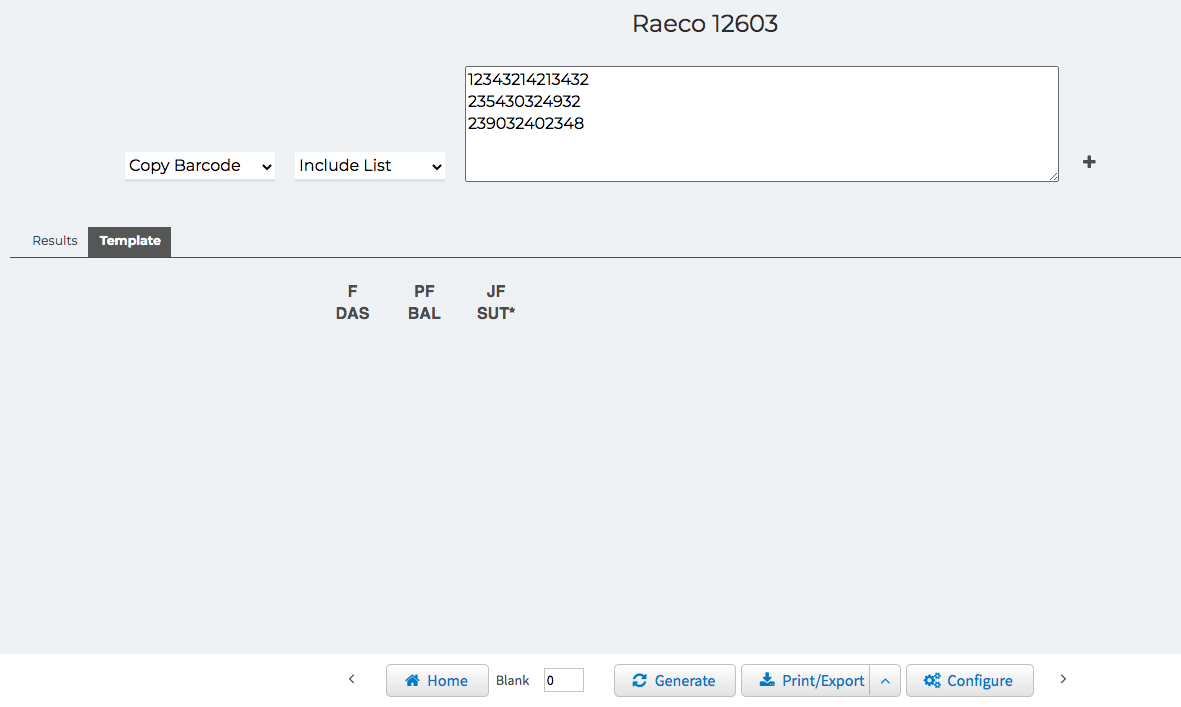
4. A new tab will load with a preview of your spine labels

6. If you have a partially used sheet of spine labels and you would like to start printing from the next spine label, count the number of used labels on your sheet Left -> Right and Top -> Bottom (like reading a book).
7. Enter the number of blank labels into the  field from the toolbar at the bottom of your window.
8. Click  from the toolbar at the bottom of your window to reposition the labels according to the already used labels.
9. To continue to print the labels, click  from the toolbar at the bottom of your window.
This will download the spinelabel report to your computer.
10. Open the report in a PDF Viewer. Do not print the report from your Internet Browser.


Related Video
Comments
0 comments
Please sign in to leave a comment.